
Have you been doing your data collection on paper? Maybe all complied in a binder or all over your classroom?
Not sure where your data forms are? Or worse, you don’t even have a system yet?
Need some tips to help you get organized? Look no further!
My first years of teaching was a disaster, I had paper data sheets EVERYWHERE!! I often put off analyzing data until progress reports were due. Something needed to change. I had to find a better system that I could analyze and use that data to drive my instruction.
I found my love for Google Forms quickly. It definitely was a lot of trial and error when I started off to figure out how detailed I needed my forms. I’m going to walk you through how to create a Google Form to track IEP goals!
If you want data forms already created for you, grab this resource!
2. To password protect this form, type “PASSWORD” in the untitled question field. Then click the 3 dots. Click both the description and response validation.
In the description write “enter the password to continue”. In the validation boxes, select from the drop-down menu “regular expression”. Then select “matches” and enter your password of your choosing in the pattern field. In the section “custom error text” just type “incorrect password”, this will pop up if someone types in the wrong password.
PRO TIP: make sure that you toggle the “Required” button so that the password is required at all times.
Then add a page break, this is the most important step. Click on the 2 bars which will create a new section of the form. This will allow anyone taking data to have to use the password first and then go to the google form.
If you choose not to use the password, move onto the next step.
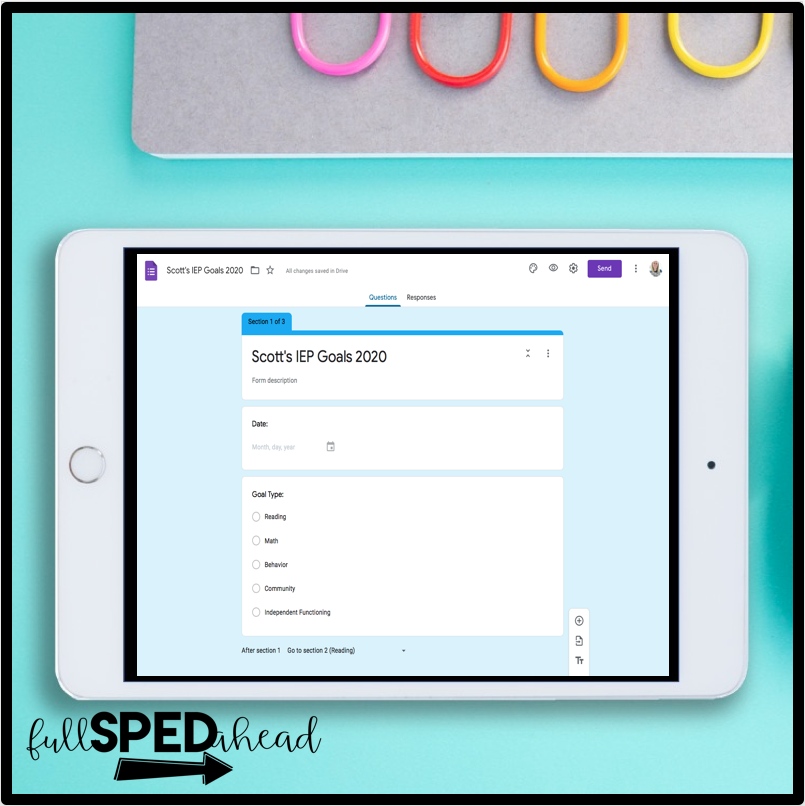
3. The first questions I like to mark are the date, staff name and goal type.
In my district, staff are required to login so their email will be included in the data tracking. If that is not a requirement in your district, make sure you leave a question for staff to type or select their name.
I also leave a question for goal type so that staff can select which goal it is. Make sure to toggle “go to section based on answer”. I create a new section for each goal type so that staff will only see that particular section.
Create your goal types and then add a new section
4. Go ahead and rewrite the title in the new section. (This happens when you use the page break)
Write the goal you would like to track but make sure that everyone who is taking data will know what is expected of them and materials that they need to use to track this data. You can add a description to the new section as well. I like to write what goals will be found on this form.
Then, click the plus button on the right hand side, which will give you a new “question”. This is where you will type in your first IEP goal. Depending on what your goal is asking you to do, is what type of response you will choose. You can play around with the different types of responses that you could use that would better suit your IEP goals.
Add in as many goals and sections as you would like using the plus button.
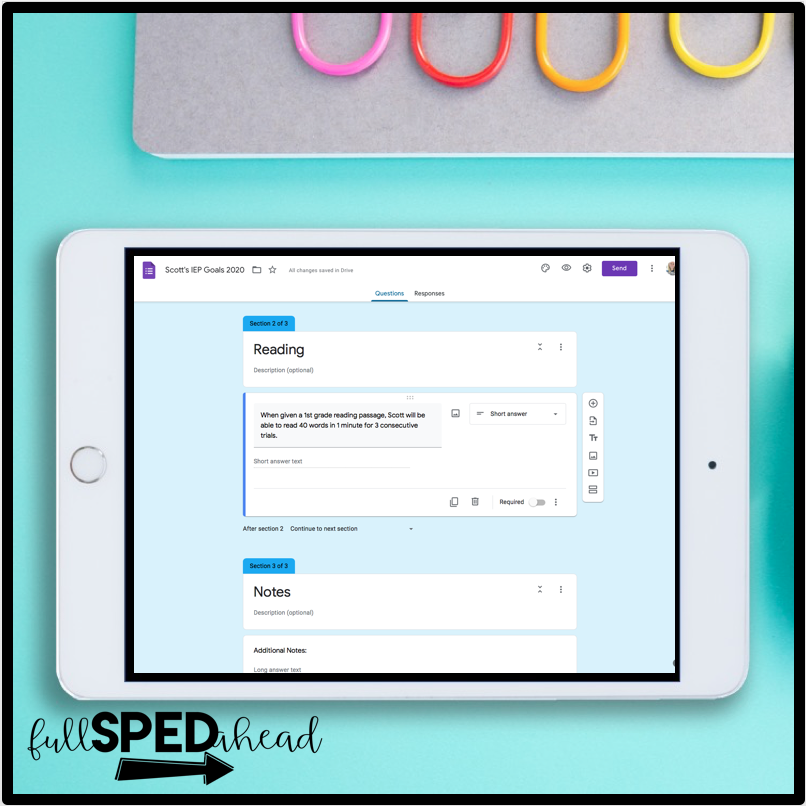
5. Make sure to add a comments section at the bottom of the form so that people can input anything that was out of the ordinary, such as, the child was distracted, or maybe they fell asleep. You may want that noted on the form. I don’t like to get so specific, because time is so limited, but it could be something that you add Also, make sure that in this field that you make it so that it is not required, because there may not be notes that need to be taken every time that you take data.
If you’re looking for done for you forms, check out this resource!
Once your form is completed, you can now see what it looks like by pressing the eye button on the top right hand of the screen. From here, you can practice using the form to make sure it looks and performs the way that you want it to.
Now you are ready to share it. When you are back in the editing mode, click the “send” button on the right hand top of the screen. This will give you many options to share it with the people that will be taking data for you.
Make sure to send it to yourself and either save this email by “flagging” or “starring” it as a favorite.
Make sure to read more about IEP goals and data collection, here!
Want a walk- through course? Check out the digital data collection course!
PRO TIP: I open this form in my phone or school issued iPad and bookmark it to my favorites page- quick access on the run!!
Bonus tip! You can use QR codes to place around the room for a quick snap of a picture and data collection as you walk with students through the hallway.
Instagram | TeachersPayTeachers | Facebook | Boom Learning Library | Pinterest | Youtube
